- James Wassinger
- Posts
- 💯 Get an Emailed Report of Azure Subscriptions With A Low Azure Security Score
💯 Get an Emailed Report of Azure Subscriptions With A Low Azure Security Score
For Better Tracking and Reporting, View this Step-by-Step Guide to Set up Your Own Emailed Report of Azure Subscriptions with a Low Azure Security Score.
James Wassinger
May 19, 2024

Summary
This article outlines how I created an emailed report that displays Azure subscriptions with a Microsoft Defender for Cloud Security Score below the recommended 80%.
Results
After completing this step-by-step guide, you will create a process for reporting Azure subscriptions with a security score below 80%. The process results are shown below.

⚠️ Note: The results show a 100% score for testing and display purposes.
Requirements
A minimum of one Azure subscription
Enable Microsoft Defender for Cloud
A domain name (Used for sending email with Sendgrid)
Deploy
Here are the technical step-by-step instructions for deploying this process in your environment.
Create an Entra ID Application Registration
Open the Azure portal.
From the left-side menu, select Microsoft Entra ID.

From the left-side menu of Microsoft Entra ID, select Application Registrations.

Select new registration.

On the Register an application screen, enter the Name: Azure Security Score Monitor, and press Register at the bottom.

Copy the Application (client) ID and Directory (tenant) ID for later use
Select Certificates and Secrets from the left-side menu.

Select New client secret, name the secret AzureSecurityMonitor, select 24 months, click Add, and copy the secret value for later use.

Select API permissions and remove the default User.Read permissions. These default permissions are not required.


Using Access Control (IAM), assign the Reader role to the Azure Security Score Monitor Entra ID Application Registration at the subscription or management group scope for the resources you want to monitor.

Create an Azure Resource Group
Select Resource groups from the left-side menu of the Azure Portal.

Select Create to create a new resource group.

On the Create a resource group page:
Select the subscription
Resource group name:
rg-SecurityScoreMonitorSelect a region
Click Review + Create

Create an Azure Log Analytics Workspace
On the Create Log Analytics workspace page, enter the name la-ascscoreemonitor and click Review + Create.

Create an Azure Key Vault
On the Create a Key Vault page, the the below information and Click Next.
Key vault name:
kv-ascscoremonitorRegion: Select your resource group region
Pricing tier: Standard

On the Access configuration page, leave the default Azure rule-abased access control (recommended) selected and click Next.

On the Networking page, select the following options and click Review + Create.
Public network Access Enabled
Allow access from Selected Networks
Exception: Check to Allow trusted Microsoft services to bypass this firewall.

Navigate to the newly created Key Vault. On the kv-ascscoremonitor page, click on Networking and add your client’s IP address. You can use this resource to find your client’s IP address: https://whatismyipaddress.com/.
Select Access Control (IAM) from the left-side menu and assign your account the Key Vault Administrator rule. ⚠️This assignment is temporary.
From the left-side menu, click on Secrets. Click on the Generate/Import to create a secret.
Name: tenant-id
Secret value: Enter the tenantId copied from the application registration step.
Click create.
Repeat this to add the client-id and client-secret to the key vault.
After adding the application Registration values to the Key Vault, remove your username from the Access Control (IAM) and your IP address from the Networking section.
Create an Azure Logic App
Enter the information below on the Create Logic App page and click Review + Create.
Logic app name:
logic-ascscoremonitorPublish: Workflow
Region: Select your resource group region.
Enable log analytics: No
Plan Consumption

Open the new Logic app and select Identity from the left-side menu. Toggle the status to On, click Save, and then Yes.
Assign the Logic App Permissions to Access the Key Vault
Open the Key Vault kv-ascscoremonitor, and from the left-side menu, select Access Control (IAM).
Click Add, and Add role assignment. Select the Key Vault Secrets User role. Uder members, select Managed Identity and choose the logic app identity. Press Review + Assign.

Setup Resource Diagnostic Settings
Key Vault
From the kv-ascscoremonitor Key Vault page, select Diagnostic settings from the left-side menu, click Add diagnostic setting, enter KV Security Monitor Settings in the Diagnostic setting name field, select allLogs and AllMetrics, select Send to Log Analytics workspace, and click Save.

Logic App
From the logic-ascscoremointor Logic App page, select Diagnostic settings from the left-side menu, click Add diagnostic setting, enter Logic Security Monitor Settings in the Diagnostic setting name, select allLogs and AllMetrics, select Send to Log Analytics workspace, and then click Save.

Create the Logic App
From the Logic App page, select Logic app designer
Setup the main trigger
From the left-side menu. Click Add a trigger, search for and select Recurrence.
Configure the recurrence. Lets’ check the Security Score of our resources once a week.
Interval: 1
Frequency: Week
Time Zone: select your Time Zone.
Start time: enter your desired start time, example,
2024-05-17T08:00:00ZOn these days: Monday
At these hours: 8
At these minutes: 00

Retrieve and store the secrets from the Key Vault
Press the Add an action button, search, and select Get secret. Enter the required information and press Create to create a connection to the Key Vault.
Connection name:
AzureKeyVaultAuthentication Type: Managed Identity
Vault name:
kv-ascscoremonitor

⚠️ There will be an error when you use the dropdown to attempt to select a secret.

Resolve the Logic App Connection to Key Vault
Open the Key Vault, select Logs from the left-side menu, enter in the below query, and press Run.
AzureDiagnostics | where ResultSignature == "Forbidden" or ResultSignature == "Unauthorized" | project CallerIPAddress
Copy all the unique IP addresses, open Networking from the left-side menu, add the IP addresses under Firewall, and press Apply.

Continue the Logic App Design
Return to the Get Secret step, select client-id from the dropdown list, and change the step title to client-id. Repeat the Get secret steps to add a separate step for the tenant-id and client-secret.

Initialize the From email address variable
Add an action, search, and select Initialize variable. Enter the configurations below.
Name:
FromEmailAddressType: String
Change the title to
Int - FromEmailAddress

Initialize the To email addresses variable
Add an action, search, and select Initialize variable. Enter the configurations below.
Name:
ToEmailAddressesType: Object
Value: See the below JSON code block.
Change the step name to
Int - ToEmailAddresses
{
"emailAddresses": "Enter email addresses separated by ;"
}

For Example:
{
"emailAddresses": "[email protected]; [email protected]; [email protected]"
}
Initialize the email subject variable
Add an action, search, and select Initialize variable. Enter the configurations below.
Name:
EmailSubjectType: String
Value
!! Azure Security Score NotificationChange the title to
Int - EmailSubject

Initialize the subscription name variable
Add an action, search, and select Initialize variable. Enter the configurations below.
Name:
SubscriptionNameType: String
Change the title to
Int - SubscriptionName

Initialize the subscription ID variable
Add an action, search, and select Initialize variable. Enter the configurations below.
Name:
SubscriptionIdType: String
Change the title to
Int - SubscriptionId

Initialize the score threshold variable
Add an action, search, and select Initialize variable. Enter the configurations below.
Name:
ScoreThresholdType: Float
Value:
80Change the title to
Int - ScoreThreshold

Initialize the score variable
Add an action, search, and select Initialize variable. Enter the configurations below.
Name:
ScoreType: Float
Change the title to
Int - Score

Initialize the score percentage variable
Add an action, search, and select Initialize variable. Enter the configurations below.
Name:
PercentageType: Float
Change the title to
Int - Percentage

Initialize the CSS styles variable
Add an action, search, and select Initialize variable. Enter the configurations below.
Name:
ResultsStyleType: Object
Value: See the below code block
Change the title to
Int - ResultsStyle
{
"tableStyle": "style=\"border-collapse: collapse; width:100%;\"",
"theadStyle": "style=\"border: 1px solid #dddddd; text-align: left; padding 8px;\"",
"tdataStyle": "style=\"border: 1px solid #dddddd; text-align: left; padding 8px;\""
}
Initialize the HTML variable
Add an action, search, and select Initialize variable. Enter the configurations below.
Name:
ResultsType: String
Value: See the below code block
Change the title to
Int - Results
<h2>Azure Subscriptions With A Security Score Below 80%</h2>

<p>The table below shows subscriptions out of compliance with a security score below 80%.</p>
<table [Add Variable]>
<tr>
<th [Add Variable]>Subscription Name</th>
<th [Add Variable]>Subscription ID</th>
<th [Add Variable]>Security Score %</th>
</tr>
Change the [Add Variables'] to the below functions:
Table
variables('ResultsStyle').tableStyle

Table Header
variables('ResultsStyle').theadStyle

Store Azure subscription information.
Add an action, search, and select List subscriptions. Enter the configurations below.
Authentication: Service Principal
Connection name:
GetSubscriptionInformationClient ID: Enter the ClientId from the Azure Security Score Monitor Application Registration.
Client Secret: Enter the Client Secret from the Azure Security Score Monitor Application Registration.
Teanant: Enter the TenantId from the Azure Security Score Monitor Application Registration.
Press Create New
Change the title to
Subscriptions

Add an action, search, and select HTTP. Add the below configurations.
URI: Replace the
{{TenantId}}with thetenant-idvalue.https://login.microsoftonline.com/{{TenantId}}/oauth2/tokenMethod: Post
Headers
Content-Type|application/x-www-form-urlencodedBody: See the below code block
Replace the {
{ClientId}}with theclient-idvalue.Replace the
{{ClientSecret}}with theclient-secretvalue.Change the title name to
Get AuthToken
grant_type=client_credentials
&client_id={{ClientId}}
&client_secret={{ClientSecret}}
&resource=https://management.azure.com/
⚠️ At this point, press Save to save your progress.
Parse the JSON response for the Access Token
Add an action, search, and select Parse JSON.
Content : Select Body of the Get AuthToken step.
Schema: See the below code block.
Change the title to
Parse - Get Access Token
{
    "type": "object",
    "properties": {
        "token_type": {
            "type": "string"
        },
        "expires_in": {
            "type": "string"
        },
        "ext_expires_in": {
            "type": "string"
        },
        "expires_on": {
            "type": "string"
        },
        "not_before": {
            "type": "string"
        },
        "resource": {
            "type": "string"
        },
        "access_token": {
            "type": "string"
        }
    }
}
Set the SubscriptionName Variable
Add an action, search, and select Set Variable.
Name: SeubscriptionName
Value: DisplayName of the Subscription
Change the title to
Set - SubscriptionName
⚡️A ForEach will automatically be created. Change the name of this ForEach to ForEach - Subscription


Set the SubscriptionId Variable
Add an action, search, and select Set Variable.
Name: SubscriptionId
Value: SubscriptionId of the Subscription.
Change the title to Set - SubscriptionId

Setup the Graph API call to get the subscription score for each SubscriptionId.
With in the ForEach, Add an action, search, and select HTTP.
URI: See the below code block.
Method: Get
Headers:
Authorization|Bearer {{ AccessToken }}Change the title to
Get Subscription Secure Score Data
https://management.azure.com/subscriptions/{{SubscriptionId}}/providers/Microsoft.Security/secureScores/ascScore?api-version=2020-01-01-preview
⚠️ Ensure the URI contains the / after subscription and before providers. After adding the dynamic content these may get removed and cause an error.
Parse the JSON Security Data response
Within the ForEach, add an action, search, and select Parse JSON.
Content: Add the Body from the Get Subscription Secure Score Data.
Schema: See the below code block.
Change the title to Parse - Security Score Data.
{
    "type": "object",
    "properties": {
        "id": {
            "type": "string"
        },
        "name": {
            "type": "string"
        },
        "type": {
            "type": "string"
        },
        "properties": {
            "type": "object",
            "properties": {
                "displayName": {
                    "type": "string"
                },
                "score": {
                    "type": "object",
                    "properties": {
                        "max": {
                            "type": "integer"
                        },
                        "current": {
                            "type": "integer"
                        },
                        "percentage": {
                            "type": "integer"
                        }
                    }
                },
                "weight": {
                    "type": "integer"
                }
            }
        }
    }
}
Set the Percentage variable
Within the ForEach, add an action, search, and select Set Variable.
Name: Percentage
Value: Select the Body percentage property of the Parse - Security Score Data
Change the title to
Set - Percentage

Set the Score variable
Within the ForEach, add an action, select Set Variable.
Name: Score
Value: See the below code block for the function express to enter.
Change the title to Set - Score
mul(float(variables('Percentage')), int(100))
Condition Statement
Within the ForEach, add an action, search, and select Condition.
Choose a value (left): Add the score variable.
Is less than
Choose a value (right): Add the ScoreThreshold variable.
Change the title to
If Score Is Less Than 80

⚠️ For the Results example the ScoreThreshold variable was changed to 101 to get an email generated. You can change this number to fit your needs as well.
Add the True action with in the Condition statement
Within the True Condition, add an action, search, and select Append to string variable.
Name: Select the Results variable.
Value: See the below code block.
Change the title to
Append To Results
<tr>
<td {{TableDataStyle}}>{{ SubscriptionName }}</td>
<td {{TableDataStyle}}>{{ SubscriptionID }}</td>
<td {{TableDataStyle}}>{{ Score }}%</td>
</tr>
Replace the corresponding placeholders with the fuction expressions and matching variables.
Replace with the below function expression.
variables('ResultsStyle').tdataStyleReplace with the below function expression.
formatNumber(float(variables('Score')), 'F2')
Close the HTML
Outside of the ForEach, add an action, search, and select Append to string.
Name: Results
Value: See the below code block.
Change the title to
Close Results
</table>

<p>If you are responsible for any of the above subscriptions, please review and remediate the security findings for these subscriptions at your earliest convenience. </p>

<p>These security findings can be viewed in the <a href="https://portal.azure.com/#view/Microsoft_Azure_Security/SecurityMenuBlade/~/0">Microsoft Defender for Cloud</a> dashboard.</p>

<p>Please let us know if you need any assistance or have any questions.</p>

<p>Thank you</p>
⚠️ Save the Logic app.
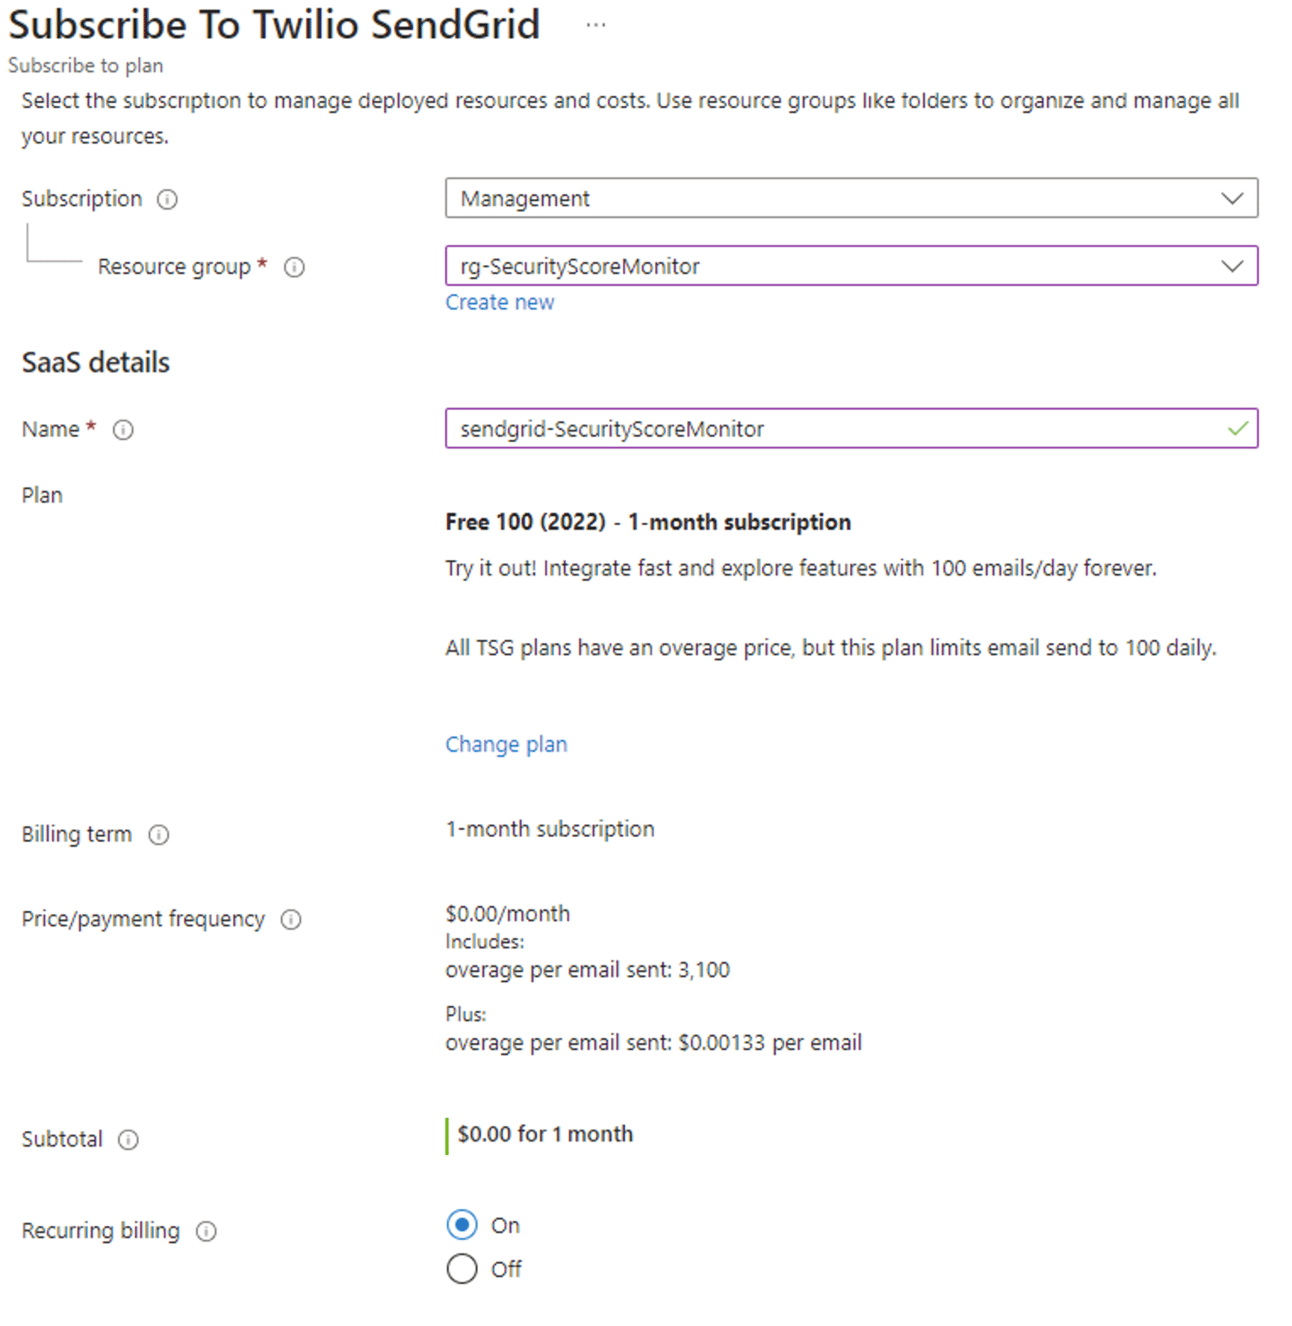
Setup Sendgrid
Within the rg-SecurityScoreMonitor resource group, press Create.

Search and select Twilio Sendgrid. Press Subscribe and Free 100 (2022).
On the subscribe to Twilio Sendgrid page, enter the below information.
Ensure the rg-SecurityScoreMonitor resource group is selected.
Name: Choose a name, example sendgrid-SecurityScoreMonitor.
Press Review + Create.
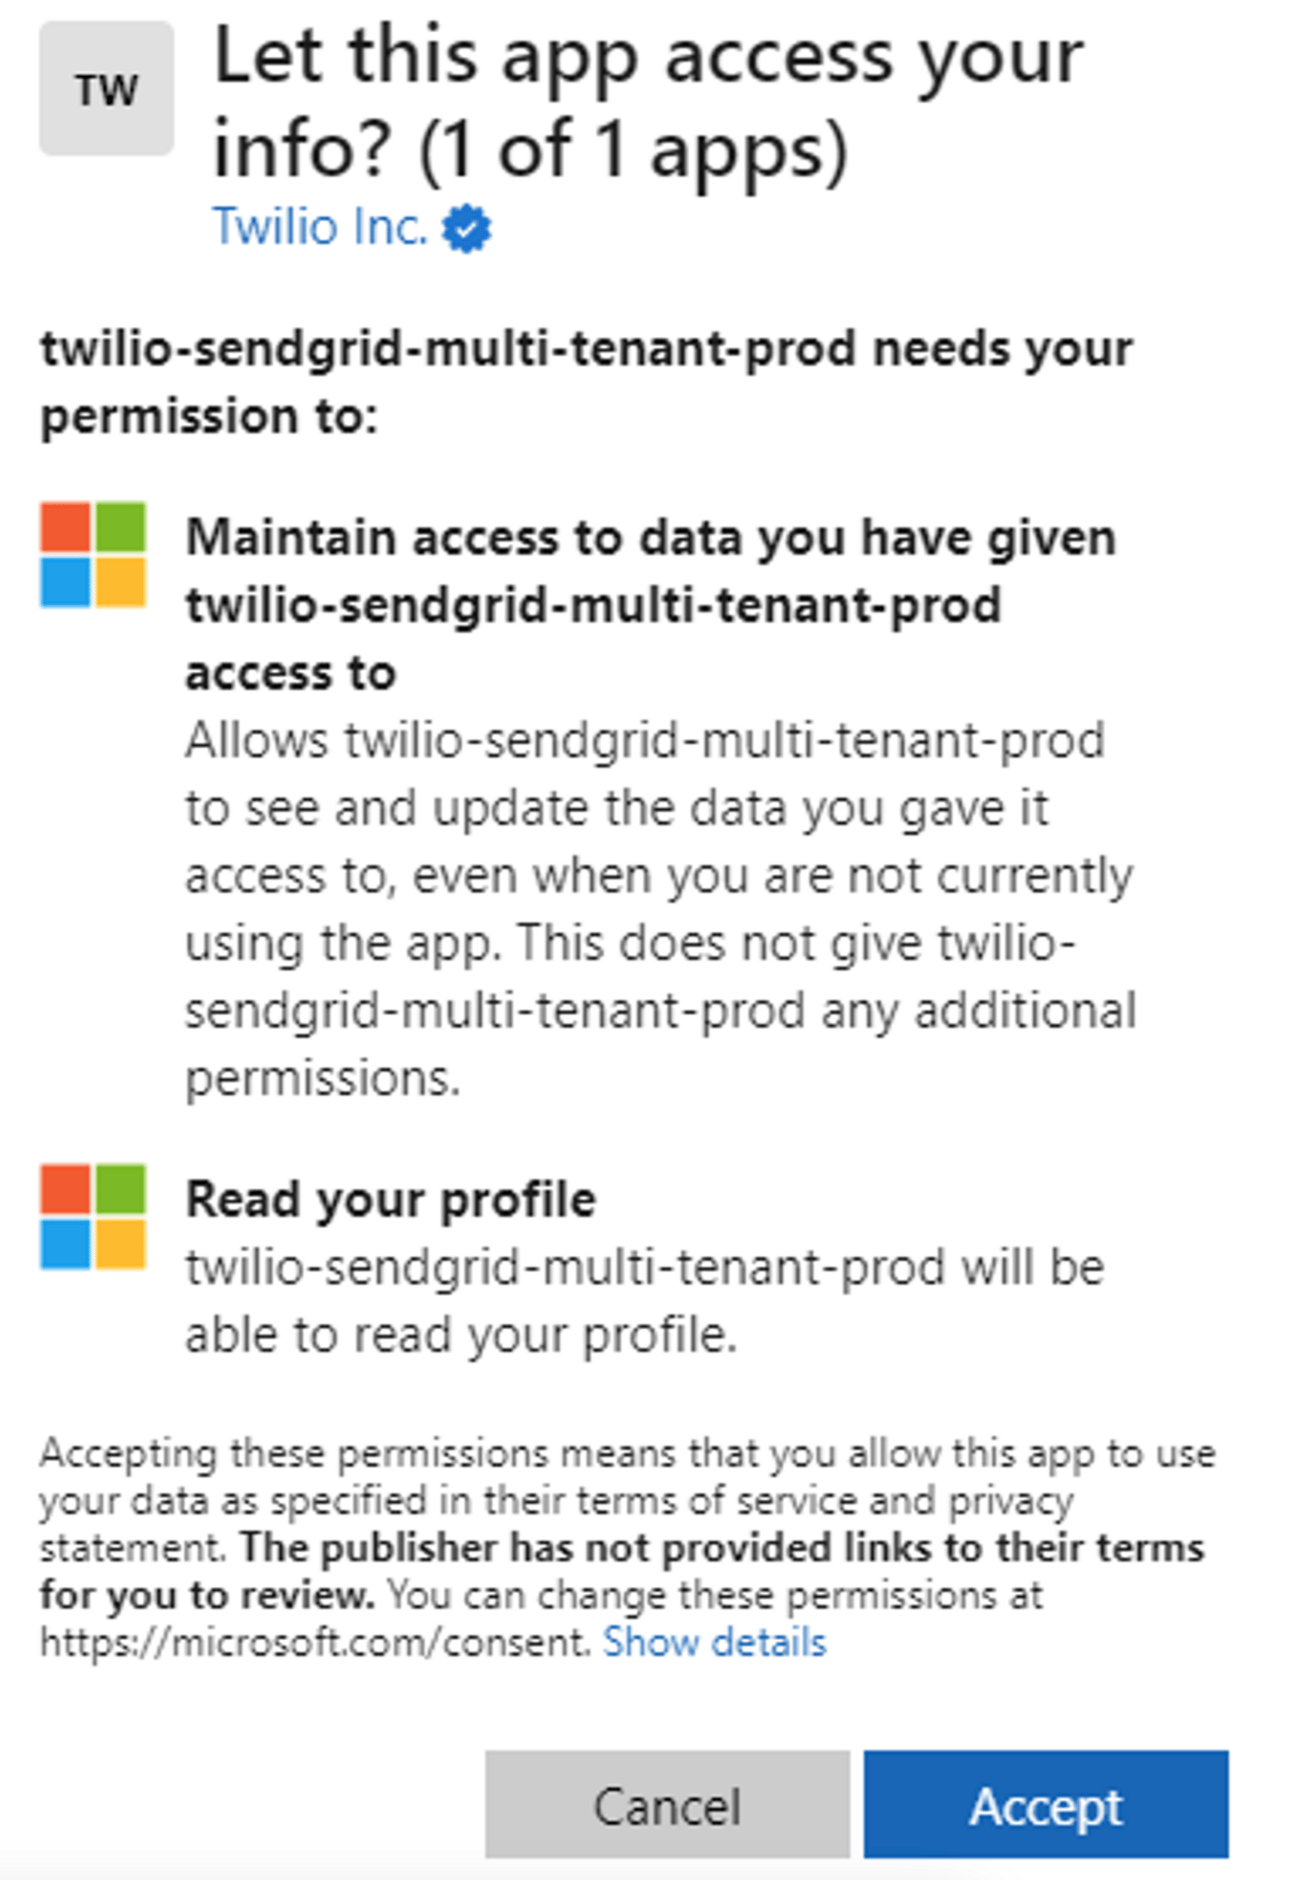
Press the Configure account now button to complete the configuration.

Accept the application permissions.
Enter your information, press Get Started.

From the left-side menu select Settings and Sender Authentication.

Press Get Started in the Authenticate Your Domain.

Enter the DNS provider name and select Next.

Enter in your domain, and press Next.

You will need to install the DNS records to complete the process. Once the records have been added to your domain’s DNS press Verify. If the verification is successful, you will receive the below verification message.

From the left-side menu click on Settings, and select API Key.

Press the Create API Key buttion in the upper-right.

Enter Azure Security Score Monitor for the API Key Name, select Restricted Access, select Mail Send, and grant Full Access. Press Create & View.
Copy the API Key for later use.

⚠️ If you see the below warning on your account dashboard, click on the ticket history link and follow the instructions from the ticket titled Status of Your Twilio Sendgrid Account Request. You emails will NOT send until this process is completed.

Complete the Logic App Design
Navigate back to the Log App Designer. Under the last action (Close Results), add an action, search, and select Send email (V4).
Connection name: SendGrid
Enter the copied API Key, Press Create New.

Complete the email setup
From: FromEmailAddress
To: Add the below code block function expression for the ToEmailAddresses variable
Subject: EmailSubject
Body: Results
Change the title to
Send ResultsClick Save
Click Run
variables('ToEmailAddresses').emailAddresses
The results should resemble what is found in the Results section.